


A while ago I made a list of fun things I could do with my kiddos. It felt like we were kind of in a slump and as much as I LOVE reading "A Zoo for Mister Muster" with them over and over again I thought it would be good to have a few other tricks up my sleeve.
I've stumbled upon this amazing fabric in the store the other day and instantly knew it was perfect for our first activity.


I cut out the fabric for them and then I let them help me make it into a "sandwich". Then I took them each to my sewing machine and let them sit on my lap as we sewed it together. It was one of those moments when I was thinking to myself, "I can't believe I'm letting them do this, but I know I'll never regret it and I'll forever remember this day."


They were so cute about taking turns and patiently waiting for the other to finish. I think they were just as excited for each other as they were for themselves. I loved that!

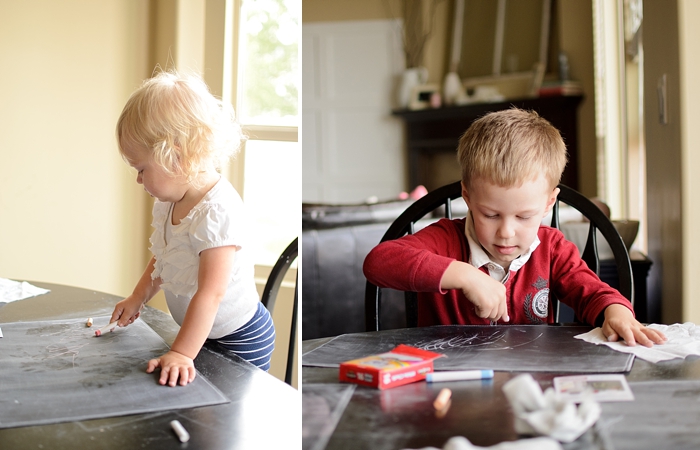
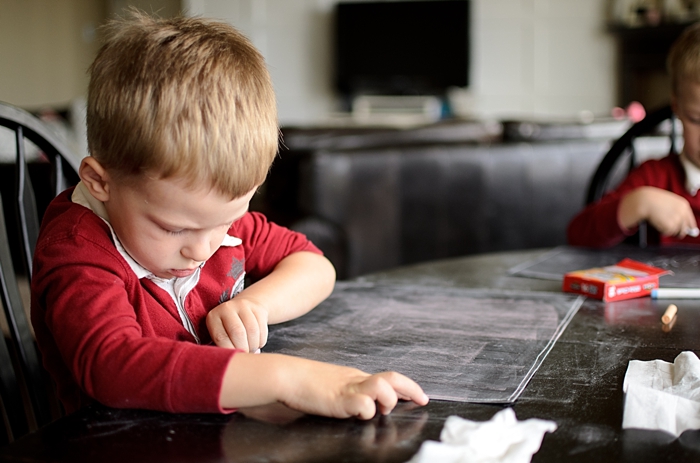
They spent the rest of the day drawing pictures and letters on their placemats. And it worked just as I had imagined, they stayed busy the ENTIRE time I was making diner. That NEVER happens in this house.

I highly recommend to every mother a Chalkboard Placemat. Really, they still love them.

Here's what you need:
* Blackboard fabric (I found mine at Joann in the utility section it is 25-26" wide so keep that in mind)
* Bias tape in any color
* matching thread
*Chalk

Cut your fabric the size you would like. I cut mine so that they would fit in our placemat drawer 18"x13". You will need two pieces the same size for one placemat.
Sandwich the two pieces together and sew along the perimeter. It doesn't even matter at this point what color of thread you use because you're going to cover it up with bias tape in a bit anyway.

The bias tape comes folded. Unfold it on the half fold and sandwich it around the edge of the placemat.

Then sew. When you get to a corner sew to the very end of the placemat. Pull out the placemat and snip the threads.

Open the fold again and wrap it around the corner. Fold it around again and you'll get a nice crisp corner.

Keep going until you reach the end. At this point you have two options. you can either pull the bias tape away from your placemat and leave a tail that can be used as a tie when you roll up your placemat...


Or just snip it off and fold it back so it leaves a finished edge.
Lastly you need to prime the chalkboard fabric. All you have to do is rub chalk all over the fabric, wipe it off and repeat a second time. After this it is ready to go!


Now doodle! A little hint: do not use the cheap chalk you can get for $.50 it does not work well. I found some Leap Frog chalk at Joann, used a coupon and it works so much better!

Give it a try. This is a great project for a beginner seamstress and a fun quick project for even you advanced ladies. Let me know how it goes and I'd love to see pictures of your finished project!
And if your really dont' want to make them I have a few for sale in my shop here.
No comments:
Post a Comment