the shop Image Map

Wednesday, October 3, 2012

Pumpkin spice goodness {RECIPE}

Let me share with you my major fall weakness.

Pumpkin Spice

I buy one of these Mainstays Pumpkin Spice candles every time I go to the big "W" store that I sort of despise, but is closer than any other store so I go to anyway. It smells like fall and I burn it all day long.


I wait every year until this beauty is available.


A Pumpkin Spice Frapaccino is my all time favorite drink! Every year for Christmas I ask for a Starbucks gift card and I save it all year long just so I can use it in the fall on this gorgeous goodness.

If the candle and the drink weren't enough how about these beauties?


Thanks to my little doughnut maker (you can also use a doughnut pan if you'd like) we have made these quite often already this season.


You want the recipe don't you. You know you do. Okay you talked me into it. 

Here's what you need:
 1 3/4 Cups Flour
1 1/2 teaspoons Baking Powder
1/2 teaspoon salt
2 teaspoons pumpkin pie spice
1/3 Cup vegetable oil (or applesauce)
1/2 Cup brown sugar
1 egg
2 teaspoons Vanilla
3/4 Cup Canned pumpkin
1/2 cup milk

for topping:
1/2 Cup melted butter
1 Cup Sugar
2-3 teaspoons Cinnamon

In a medium sized mixing bowl mix flour baking powder, salt and pumpkin pie spice. Set this bowl aside.

In a large bowl whisk together oil, brown sugar, egg, vanilla, milk and pumpkin. Mix together until it is all well combined. Slowly add the flour mixture and stir just until combined, don't over mix or your doughnuts will be kind of tough.


Spoon the batter into a gallon size storage bag and snip off the corner. fill each doughnut spot and close the lid. bake about 4 minutes or until the done light turns on. :) If you are using a doughnut pan be sure to grease it well, fill the doughnuts spots and bake at 350 for 8-9 minutes.


Once doughnuts are complete allow them to cool on a wire rack. While they are cooling melt butter. once cool dip in butter and then in cinnamon-sugar mixture. 

Eat them while they are warm! They are the best that way. If you want to keep them warm for a while stick them in your oven on the lowest temp possible. I did this until my husband got home and they tasted like I had just finished dipping them.

They are just as good as they look. Better even!!


I linked up to this fun new blog I found! Can't wait to try her recipe too!


Tuesday, October 2, 2012

A Dress for Lily

A few days ago Lily insisted on wearing my apron. It looked so cute on her I decided I would have to make her a few but never got around to it.


 Then as I was folding my mountains of laundry I came across a white onesie with a stain on the tummy. Then it came to me. Lily loves it when I wear "long dress Momma? Pretty." I had to make Lily a Maxie dress of her own.


I took the kids down to the basement and unboxed some of my fabric to let Lily choose. She started screaming in her high pitched squeal, "That one, I like that pink on Momma!" We bought the fabric upstairs and each kiddo got to help make a dress for Lily. They love sewing on the "robot machine" and this was a pretty simple project for them to help with. Plus I love that they keep saying, "We just made Lily a dress huh." 


Look for a bunch more of these to come she is a dress girl! And maybe a few in my shop later in the week.


Monday, October 1, 2012

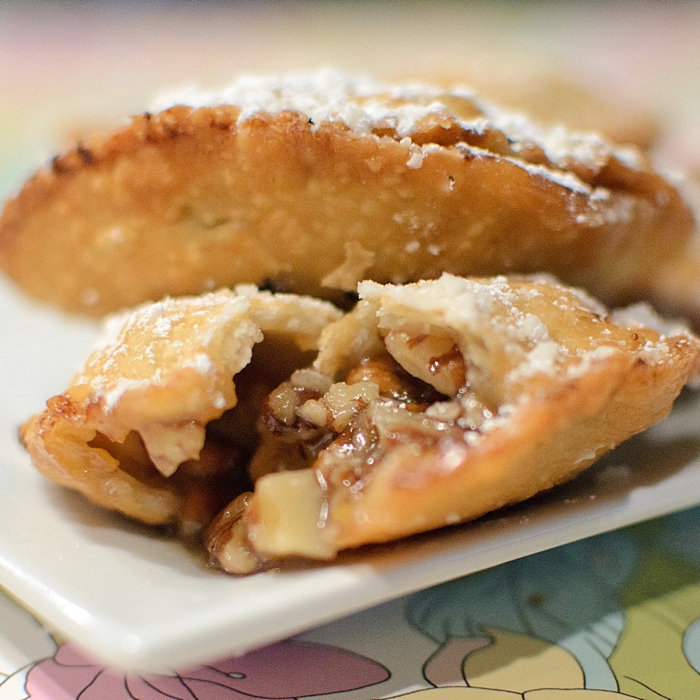
Pecan Pie Pockets {RECIPE}

My little brother came for a visit a little while ago. While he was here he found a deep fryer at a garage sale for $1.00 he bought it, used it once and with now way to get it home gifted it to me. I'm not sure if I should be saying this, but it was THE BEST GIFT EVER! 


The night he gave it to me I made Fried Chicken (recipe to come soon and also to die for) and tater tots (yes along with the mashed potatoes to go with the dinner. And as it turns out are so much better when not baked in the oven). I could not stop though so I scanned my ever faithful Paula Dean recipe books and magazines for something fried. It didn't take long and I found these!


Pecan Pie Pockets
My husband spent some time in Georgia and he gets fake angry with me when I pronounce it "pea-con".  Apparently in Georgia and the ONLY correct way to say it is "pea-CAN". He told me if I ever wanted to meet Paula Dean, which is my dream come true (she is my idol, my inspiration, my world. Maybe that's over the top, but close!) then I'd better learn to say it right.


Lets get to it. This is what you need:

1 Cup Sugar
2/3 Cup Light corn syrup
1/3 Cup Butter, melted
2 Large Eggs
1 1/2 Cups Chopped pecans
1/8 teaspoon Salt
1 teaspoon Vanilla
1 1/2 (15 ounce)Packages refrigerated pie crust
1 Egg yolk, beaten
Oil for frying
powder sugar for cute factor.


And here's what you do:


unroll pie crust on a lightly floured suraface. Cut into circles ( I just used a glass, but if you have a round cookie or pastry cutter that would work perfectly too). Re-roll dough and repeat until you have all the circles you can get.

In a medium saucepan, combine sugar, corn syrup, melted butter and eggs. Stir in pecans, vanilla and salt. Bring to a boil over medium heat; reduce heat, and simmer for 10 minutes.


Poor filling into a bowl and allow it to cool until it is room temperature.


This step is very important! Do not be impatient!
 NOT DO THIS!! I made the mistake of not letting the filling cool to room temp before attempting the pocket. Big old FAIL (I still cooked it and ate it anyway. Sad I know, but they were so good I couldn't just waste one!)


lay one of your cute circles on a clean surface and brush the egg yolk around the edges. Hold newly brushed circle in your hands and gently fold in half creasing just the corners. Then scoop 1 Tablespoon of pecan filling into the center and continue to press around with your fingers.


Now go around your little pocket with a fork. Make sure to not puncture you little pocket or the filling will leek out during the frying.


They will look so nice and cute. They will be begging you to put them in that hot oil to transform them into the beauties they were ment to be.


Fry those little babies up! You'll want at least 2" of oil. heat oil to 350 degrees fry pies, in batches, for 1 to 2 min. per side or until lightly browned. Drain on paper towels. Then comes the fun part. Dust those little cutes with some powder sugar. Isn't it obvious that I need a powder sugar duster! Maybe that will be my next kitchen purchase.


Eat them warm, but not too hot. They are still good the next couple of days, but they are divine warm and maybe a little ice cream on the side?


Saturday, September 22, 2012

Interested?

I've been thinking about making a pattern for this quilt of mine.


What do you think? Or what other things from my shop would you like to see patterned?

Friday, September 21, 2012

A tiny sneek

Remember these?
I just finished up the top for my next quilt pattern using them.


Isn't she lovely? Now if the backing would get here I could finish it!

Thursday, September 20, 2012

Chalk Board Placemat {TUTORIAL}


A while ago I made a list of fun things I could do with my kiddos. It felt like we were kind of in a slump and as much as I LOVE reading "A Zoo for Mister Muster" with them over and over again I thought it would be good to have a few other tricks up my sleeve.


I've stumbled upon this amazing fabric in the store the other day and instantly knew it was perfect for our first activity.


I cut out the fabric for them and then I let them help me make it into a "sandwich". Then I took them each to my sewing machine and let them sit on my lap as we sewed it together. It was one of those moments when I was thinking to myself, "I can't believe I'm letting them do this, but I know I'll never regret it and I'll forever remember this day."


They were so cute about taking turns and patiently waiting for the other to finish. I think they were just as excited for each other as they were for themselves. I loved that!


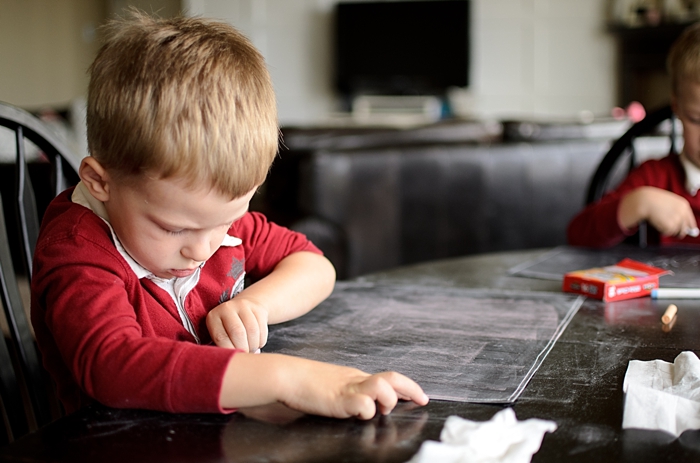
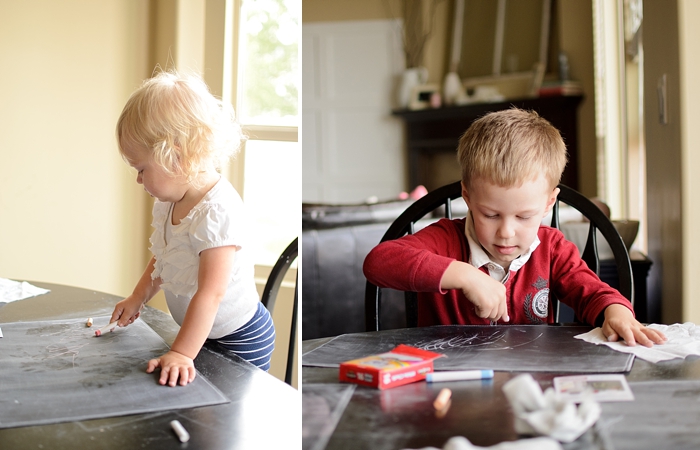
They spent the rest of the day drawing pictures and letters on their placemats. And it worked just as I had imagined, they stayed busy the ENTIRE time I was making diner. That NEVER happens in this house.


I highly recommend to every mother a Chalkboard Placemat. Really, they still love them.


Here's what you need:

* Blackboard fabric (I found mine at Joann in the utility section it is 25-26" wide so keep that in mind)
* Bias tape in any color
* matching thread
*Chalk


Cut your fabric the size you would like. I cut mine so that they would fit in our placemat drawer 18"x13". You will need two pieces the same size for one placemat.
Sandwich the two pieces together and sew along the perimeter. It doesn't even matter at this point what color of thread you use because you're going to cover it up with bias tape in a bit anyway.


The bias tape comes folded. Unfold it on the half fold and sandwich it around the edge of the placemat.


Then sew. When you get to a corner sew to the very end of the placemat. Pull out the placemat and snip the threads. 


Open the fold again and wrap it around the corner. Fold it around again and you'll get a nice crisp corner.


Keep going until you reach the end. At this point you have two options. you can either pull the bias tape away from your placemat and leave a tail that can be used as a tie when you roll up your placemat...


Or just snip it off and fold it back so it leaves a finished edge.

Lastly you need to prime the chalkboard fabric. All you have to do is rub chalk all over the fabric, wipe it off and repeat a second time. After this it is ready to go!


Now doodle! A little hint: do not use the cheap chalk you can get for $.50 it does not work well. I found some Leap Frog chalk at Joann, used a coupon and it works so much better!


Give it a try. This is a great project for a beginner seamstress and a fun quick project for even you advanced ladies. Let me know how it goes and I'd love to see pictures of your finished project!

And if your really dont' want to make them I have a few for sale in my shop here.

Tuesday, September 18, 2012

Tuesday Notes

Dear Garage,
You look so beautiful in your newly clean state. Please stay that way for a very long time. 

Dear UPS,
Really another late package! I'm getting a bit frusterated. And while yes I do live in a new house I do not live in a new country. I should not be that hard to find!

Dear Preschool Teacher,
Thank you oh so much for making my boys love you! I was so sad, scared, frightened and tired from sleepless nights worrying  (I may be a tad over protective) about my little men venturing off into a new world, but you have put my mind at ease! Thanks for making learning magical for them.

Dear Husband,
Maybe another date in our near feature?

Dear Salesman,
Today marks the 3rd day you have shown up on my doorstep. Yes, I made my brother-in-law pretend to be my husband and send you away while I hid in the pantry (I'm not kidding), but really take a hint!

Dear Stella (my sewing machine),
It feels good to be friends again. Thanks for not holding a grudge for the neglect you've received over the last while. I promise to make it up to you.

Dear The VC,
Thank you for giving me a reason to make the things that inspire me!

Dear Cute Kiddlets,
Your Mommy loves you! More than you'll ever know. Thank you for making me laugh those big belly laughs. And thank you for loving me!

Dear Life,
You're so good to me. Thank you for that! I'll try to return the favor. 

Love,
Kristy


Monday, September 17, 2012

Sweet Lil' Shoppers

 At times such as this I'm thankful to have my phone camera.


A quick trip to the fabric store and cookies because it wasn't as quick of a trip as planned. They were so good! And I think my Little Miss might just have a fetish for fabric like her Momma.


Saturday, September 15, 2012

Honeycomb obsession

When I was pretty little my best friends family got a new microwave. It was so amazing, it had a plate in the center of the microwave that turned the food in a circle so that it cooked the same everywhere (yes I'm that old!) Then all of the sudden it seemed as though EVERYONE, except me, had a microwave like this. I discussed with my Mom the fact that I saw these microwaves everywhere now. She in her Mommy wiseness simply said, "Kristy, those microwaves have been around for a long time, you are just noticing them now that you know they are here." Since that day I have seen this happen over and over again. Canned lighting, it's been around for ever, yet I never really noticed it until I was building my own house and now I'm a bit obsessed. I could go on and on. 

Remember this floor? Remember how much I LOVED it? 


Now I am seeing hexagons absolutely EVERYWHERE! I can not get them out of my head! 

Lining freeways in Arizona...

Shopping carts...

Honeycomb...


I'd love some local Arizona orange blossom honey right now!

Even on the bottom of my boys flip flops (you don't want to see a picture of those).
I've been working on something fun with this great honeycomb pattern. Look for it next month!!

Related Posts Plugin for WordPress, Blogger...